I’m so grateful for the ways you show up and shine with me. All the times you read my messages, all the times you spend on the mat with me or listen to my yoga-genda, all the times you say yes to my workshops/programs (or think about it), all your IG and FB postings and likes, all the times you share my content or bring a friend to class. Thank you!
Your light and love inspires me.
When my gratitude cup is so full that one more gesture of kindness will overflow my heart, that is when I must share the love. Go ahead, share the love: call your beloved aunt or cousin, reach out to your high-school friend, take your favorite office mate to lunch, cancel a holiday party and spent more time with your pet (or your children, I guess)…it’s all worth it. The spirit of Mother Abundance is radiating upon you, and before the news cycle brings you down from your gratitude high and the holidays’ madness pushes your heart into survival mode, donate to your favorite organization (or pick a favorite organization to give money to, it’s time, love). Here are some I support and want you to consider,
EVERY TOWN FOR GUN SAFETY - Every day, more than 90 Americans are killed with guns. Your generous donation helps EveryTown work to prevent gun violence and save lives
ABHYAYA YOGA FOUNDATION - Abhaya Yoga Foundation empowers and educates the underserved groups of children and women who may not normally have access to the powerful teachings of Yoga.
AMERICAN RED CROSS - From small house fires to multi-state natural disasters, the American Red Cross goes wherever they’re needed, so people can have clean water, safe shelter and hot meals when they need them most.
I can keep going, but I’m going to leave it at three, you know, to leave room for abundance. Share your favorite organization to support with friend with me. We'll spread the voice.
Let us treasure what needs to be treasured, let us give thanks and shine...no matter what.
Light and peace,
E
Eliminate Surfaces and conquer clutter
As true as gravity will keep your ass from floating in space, so will empty flat surfaces accumulate clutter in your home or office. That is because clear surfaces provide unstructured, hook-free, often-vertically-unlimited storage. If you don’t believe me, go ahead make a clear surface–table, desk, counter-top, or even inside a drawer–and see how long it takes for it to get cluttered up with all varieties of stuff: unopened mail, brochures, dog leashes, pencil sharpeners, etc. Our brains seem to be telling us "don’t know where to put this crap, stack it on that table, sure you'll get to it soon."
Here is another truth that will help you deal with this issue, clear surfaces tend to be magnets for stuff we don’t need, use or even want. These clear surfaces are especially useful for holding stuff we don’t want to deal with. Why do you think that “to table” something means to postpone the issue?
If you are looking to de-clutter and simplify your home, try removing a surface or two–one less end table, even one less dresser. If this is too much for your cluttered mind, create limits on the surfaces you have by adding a small tray or small basket to collect your precious I-don't-want-to-deal-with-this stuff (hint...smaller the tray, the smaller the clutter). Without easy places to deposit and pile stuff, we often find ourselves compelled to deal with it (or toss it on the floor, I guess, but tripping on it will force you to deal with it).
Tea Time
Perhaps it's the chilly winter days that are approaching or perhaps it's the impending beginning of a new season of Downton Abbey ; the truth is that tea season is upon us. The bitterness and sweetness, perhaps it is its resemblance to the essence of life that make tea such a pleasurable experience. So here is some basic information I found helpful in my own tea journey.
What is Tea anyway?
All “true” tea comes from the same plant, called the Camellia sinensis. Any leaf, root, fruit or flower that comes from a different plant is considered an herbal tea. For example, chamomile flowers and peppermint leaves are considered herbal teas because they do not come from the traditional tea plant. It is important to distinguish between real tea and herbal tea since the flavor, health benefits and nutritional characteristics vary from plant to plant.
THOUSANDS OF TEAS, DIVIDED INTO 4 CATEGORIES There are thousands of different kinds of teas, each with their own individual appearance, taste and aroma. To make sense of all the variations, “true teas” (those made from the tea plant, or Camellia sinensis, versus herbal teas which come from other plants) can be categorized into 4 major categories: white, green, oolong and black. Generally, these categories refer to how much a tea is oxidized. The more oxidized the blacker the tea. See table below.

How to brew the perfect cup of tea?
Once you know the basics, brewing the perfect cup of tea is easy! If you can boil water, you can make tea. Fine tuning the flavor is essentially a game of manuvering and adjusting 3 elements: water temperature, steep time and amount of tea used.
With just a little practice, preparing a great tasting cup of tea is easy and will quickly become second nature. The right brewing equipment can also further simplify the process.
BASIC DIRECTIONS:
Bring fresh, cold water to a rolling boil. Always start with the freshest, purest source of water available as this will heavily impact tea's flavor ... it is the main ingredient, after all!
Add tealeaves to a teapot, fill-your-own teabag or infuser basket. Use 1 teaspoon – 3 teaspoons (1 tablespoon) per cup (8 oz) of water depending upon desired strength. Adjust to taste.
Pour boiling water directly over black, oolong and herbal tea. Allow water to cool slightly before brewing green tea, white tea or yerba maté. Cover.
Infuse (steep) leaves for 2-5 minutes; 3.5 minutes is a good standard steep time that works well for most teas. Do not oversteep or tea may become bitter. If you prefer strong tea, do not over steep; simply use more leaves.
Remove tea sachet, bag or infuser from water or strain leaves.
How to Clean Your Tea Kettle?
To remove mineral deposits, boil equal parts white vinegar and water inside kettle. Remove from heat. Let sit several hours; rinse. Hand wash the pot's exterior with a gentle pot-scrubber sponge. Let tap water run for a few moments before adding it to the pot.
Now brew yourself a delicious cup of tea. Enjoy!
A Prayer of Thanks to Nature
 We may tend to attribute ego-driven behaviors to Nature (i.e., wrath), but I know that Nature is Love, because God is Love. And Love has no Ego. As we prepare to gather for Thanksgiving, I want to share this beautiful prayer that was written a century ago, but its connection with Grace and Gratitude is permanent and as relevant today as it will a hundred years from now. Happy Thanksgiving.
Prayer for Nature by Walter Rauschenbusch (1861–1918)
O God, we thank you for this universe, our home; and for its vastness and richness, the exuberance of life which fills it and of which we are part. We praise you for the vault of heaven and for the winds, pregnant with blessings, for the clouds which navigate and for the constellations, there so high. We praise you for the oceans and for the fresh streams, for the endless mountains, the trees, the grass under our feet. We praise you for our senses, to be able to see the moving splendour, to hear the songs of lovers, to smell the beautiful fragrance of the spring flowers.
Give us, we pray you, a heart that is open to all this joy and all this beauty, and free our souls of the blindness that comes from preoccupation with the things of life, and of the shadows of passions, to the point that we no longer see nor hear, not even when the bush at the roadside is afire with the glory of God. Give us a broader sense of communion with all living things, our sisters, to whom you gave this world as a home along with us.
We remember with shame that in the past we took advantage of our greater power and used it with unlimited cruelty, so much so that the voice of the earth, which should have arisen to you as a song was turned into a moan of suffering.
May we learn that living things do not live just for us, that they live for themselves and for you, and that they love the sweetness of life as much as we do, and serve you, in their place, better than we do in ours. When our end arrives and we can no longer make use of this world, and when we have to give way to others, may we leave nothing destroyed by our ambition or deformed by our ignorance, but may we pass along our common heritage more beautiful and more sweet, without having removed from it any of its fertility and joy, and so may our bodies return in peace to the womb of the great mother who nourished us and our spirits enjoy perfect life in you.
Less <3 More
 “What if we could save money, radically reduce our environmental impact, and have a freer, less complicated life?” Now that is an attention-grabbing-question, isnt’ it? This exactly is the premised behind the interior-design project LifeEdited. In the project, Graham Hill challenged interior designers to create a space using technology and common sense to transform his NYC 420 square foot apartment into a comfortable place to live. I mean, comfortable: home office, space for 2 guests to stay over, a sit down dinner for 12, lounge space for 8 and even a workout/steam room!!
I totally recommend you look at the designs submitted- the winning designs are outstanding, and you can also see all the submitted designs. It is a feast of multi-function and organization. However, you don’t have to move or remodel your home to achieve this Less = More status, you can start right now and I think that we can all use technology and common sense to make more out of our living spaces. Here are some life-editing steps we can all implement immediately:
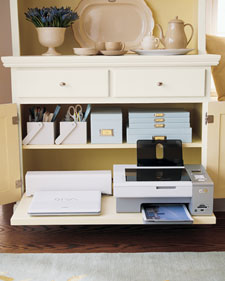 Multipurpose spaces: allowing your real estate to be multifunctional doesn’t have to involved designer or custom-built contractions (though I have seen some amazing work at my friend Lalita’s
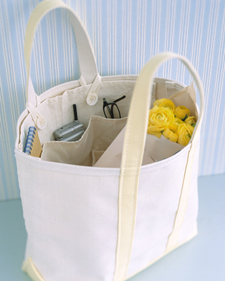 renovated apartment). If you want to transform, for instance your living room into your personal yoga space, add casters or furniture sliders to your coffee table and sofa and listo, you have created the necessary space for your yoga mat. Another example could be packing your laptop computer and file folders in a canvas tote when you are not using them, this can clear a lot of space of your desk or kitchen table.
 Store everything digitally: this may require some effort and time, but the amount of space you will gain will be lucrative and satisfying. First sign up to receive your bills electronically-don't ask any question, just do it. Additionally, little by little you can download your CD and DVD to your computer. Donate the hard copies to your local Library. Chances are you have a bulky printer that scans, faxes and make copies; it is time you put it to use and begin to scan to your computer all those snapshots from the 90’s that you have been carrying with you for decades. You will be surprise the amount of embarrassments you will inflict on your facebook friends. Worried about computer memory? You can use countless sites to store your information.
Think Accessibility vs. Ownership: Netflix, eBooks, SoundCloud…should I continue? You get the idea, why have excess DVDs, Books, CDs collecting dust and taking space. The only way to allow for the divine grace of new/fresh ideas to come into your living space is to have space for it (spiritually, mentally & YES, PHYSICALLY!)
 Only Keep Essential Necessities: Constantly, ask yourself how is this item serving my vision, my values and everyday harmony? That is a tough requirement to fulfill, but aren’t you and your home worth it? Think about it, how could you take space from your everyday existence for something that isn’t allowing you to live a better life? Edit, edit harshly.
Chronicles of a Closet Cleanse
My smart, beautiful and ever pragmatic friend Jennifer Rose did what most of us are afraid of doing; she plunged into the arduous yet rewarding task of excavating, cataloging and yes, organizing her closet. Jenifer hosts a style blog. I recently caught up with her and we talked about the scary mission of organizing one's closet. Please read her anecdotal accounts below, at the end you can also read the unedited Q&A session we held; I enjoyed so much exploring the very spiritual and practical ways in which organizing can elevate the status of the spaces we have, I hope you enjoy it too.
What I Did Over The Long Weekend - J. Rose Style
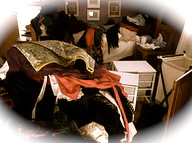
So my first post is about what I did this weekend. The weekend started simply enough, I went to the library to pick up some movies and while perusing the non-fiction books section I found this, "The Shopping Diet: Spend Less to Get More", by Phillip Bloch. Reading the bio on the back one can ascertained that Bloch is a jack of all trades, stylist, writer, commentator, the list goes on. The book is aimed at people with shopping compulsions or addictions, the promise is that by considering what you actually wear in your wardrobe you will become more aware of what you need, what your style is and what looks good on your body, therefore less likely to make those unnecessary purchases that lead to a budget crisis. I was intrigued. I am not a compulsive shopper, but I always felt like a terribly uninformed or unaware shopper. Constantly buying something I like without considering what I have at home to go with it or even if it was really flattering to my figure. As a result my closet was a mish mash, without enough solid pieces to build an outfit with and a bunch of clothes that didn't fit right. My closet was in desperate need of editing. Following the steps in Part Two of the book (Part One is about assessing your style, what you wear frequently, etc...) I emptied my entire closet, in season, out of season, accessories, jewelry, socks and underwear. My bedroom looked like my closet threw up everywhere. Ahh!! However my closet was completely empty.
Using the tips Bloch outlined, I separated my clothes into categories and then I began to edit. Trying on everything in front of a full length mirror and deciding if it stayed in the closet, was fixed, was sold on eBay or donated.
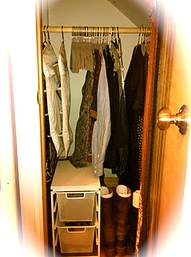 My very well edited closet. Not sparse, minimalist darling.
It took an entire afternoon, but the process was very cathartic and eye opening. I don't have a lot left in my closet, but what is left are clothes and accessories I truly love and wear constantly. The pieces that I feel are missing from my, now very well edited closet are written on a list that will go with me whenever I go shopping. I don't feel like I need a lot of clothes, in fact the more clothes I had the more stifled I felt. Yes, I thought that all those clothes gave me more outfit choices, but they didn't. Having too many choices made getting dressed too complicated and overwrought. I think that the key to style is knowing what works for you, on you, having great accessories to spice up any outfit and carrying yourself with confidence wherever you go.
Q & A - A Yogic Perspective in Organizing Your Closet
Q- So Jenifer, what motivated you to look into the closet?
A- Mornings are always crazy,the most challenging part of my mornings were when I went to get dressed, I would open the closet, see it stuffed with clothes and feel completely overwhelmed. In February, I was reading Philip Bloch's book "The Shopping Diet" and it had a statistic like women do not wear 80% of the clothing they own, instead they wear the same key pieces that are comfortable and fit. Major aha! moment, choices in terms of my closet are bad, instead of feeling empowered by the choice of clothes, I felt overwhelmed. I knew the closet needed to be purged and resolved to do it immediately.
Q- What was your vision or intention when you finally decided to get your closet re-organized?
A- When I started I knew I wanted to cut that "80%", the extra stuff, the fat. I wanted my closet to be well edited to suit my current taste, only containing pieces that fit well and make me feel great when I wear them. Every woman wants that, I just didn't realize how much I didn't need till I dug in.
Q- Did you use any organization technique in particular? What tips or advice was most useful for your closet cleansing?
A- The first thing I did was to remove the extra hangers, this freed up a lot of space in the closet and made it easier to work. I put the hangers in a box to the side in case I needed them. Next I took everything out of the closet, in-season, out of season everything. When everything is hanging up in a dark closet it's hard to evaluate, bring it into the broad light of day so you get a clear picture of what's been lurking in there. As I was taking things out of the closet I sorted them by type, skirts, shirts, pants, etc... I made piles of like items so I could evaluate what I had, example why do I have three pairs of black pants.
I know a lot of people are probably grimacing at the prospect of this kind of deep cleansing, but you need to "make a mess" to get things in order. Also do not, I repeat do not go out and buy things to organize the closet before you clean it out. Clean it out first then see what you need.
Q- How did you decide what garments or accessories had to go? What were you looking for when you looked in the mirror? and What did you do with items that you weren't sure if they had to go?
A- In order to decide what stayed and what went I brought in a full length mirror. I tried everything on and was brutally honest with myself about, what worked, what didn't and what was just so-so. If you aren't able to be that honest, invite over some friends that will be.
For sorting the things to get rid of I pulled out four bags, I labeled them all, one for donations, one for things that I like but need to be fixed, another for things I thought I could sell on eBay (new or almost items) and the last one was for sentimental clothes (things I won't wear, but have a special meaning and maybe one day I will part with). I also brought out a garbage bag for things I couldn't salvage (happy to note, that the clothes in the garbage were recycled into cleaning rags).
If there was a case where I couldn't decide I took a picture of myself wearing the item. Usually the picture didn't lie, if it didn't flatter my figure out it went. Clothes that don't suit your shape are like backstabbing friends, they'll tell you that you look great to your face and then turn around and reveal your flaws to the world, who needs that.
Accessories are only as good as the clothes they go with, if I had any scarves, belts and shoes, that never matched the clothes I have, I got rid of them. It's probably because they were colors I never wear. Also I got rid of any belts or shoes that didn't fit, they were just taking up space.
When I put everything back in the closet I knew it was only things that fit, that flattered and that matched what I owned. I sorted the clothes by type when hanging them up (making it easy to sort through) and the color.
More isn't always better, sometimes it's just more.
Yoga Mat Cleanse (a.k.a. how to clean your mat)
This is a love story. If you’ve practice yoga for any amount of time, by now you’ve develop a trusting relationship with your yoga mat. Yes, you’ve blamed it for your short comings, you’ve stepped all over it, you’ve tried parting with it, you’ve even cheated on it, but your heart and your practice always come back to it. So as any good relationship counselor will tell you, today is the best time to strengthen this relationship and I suggest you start with a bath.
Now lets face it, after the bliss of Savasana, picking up a spray bottle may be the last thing in your mind, but, alas, as with any cleanse strategy, maintenance is everything. If you keep your feet clean and your practice isn’t a sweat fest, a quick spray and wipe once a week if you are an active practitioner (or every other week if you are a passive one) should be enough to keep your mat fairly clean and free from smell-inducing-bacteria.
I’ve tried various methods to clean my mat; from good 'ol soap (bad, bad, bad idea), to fancy prepackage wipes, I didn't find them very effective. After 20+ years of yoga practice I’m sharing my yoga mat cleansing routine. These methods I’ve used for years on my robber-like mats and fabric-like mats, not with the leather like kind…If you own an upscale yoga mat, chances are that the manufacturer has instructions for cleaning it, you’re gonna have to make a judgement if my methods will work.
Spot cleaning and after class:
So this is my formula for a yoga mat cleaning solution, which I created after trying various versions. There’re products out there in the market to clean yoga mats, by all means try them out, I am sure some are fantastic. Whatever you use, make sure there isn't any surfactant in it (i.e., a fancy way of saying soap) or you will be sliding on your mat like a lizard on marble floors - not pretty.
Ingredients for the yoga mat cleansing solution:
spray bottle (glass preferred)
white vinegar (a natural bleach, disinfectant)
water (Universal solvent, ask any Alchemist!)
alcohol such as vodka (natural drying agent, ask anyone who drinks martinis)
Tea Tree Essential oil and/or Lemongrass (any other antibacterial Essential Oil will work, I order my with Young Living)
In a spray bottle add 1 part white vinegar, 2 parts water, 1 part alcohol and 1/1000 parts tea tree essential oil. [For example, 1 cup vinegar, 2 cups water, 1 cup alcohol, ~15 drops of essential oil] This is a very inexpensive way to create a disinfectant and cleaning agent that does not contains any type of surfactant and it is also great to clean windows/mirrors! This solution works great, just spray it on your mat and use a cleaning cloth to wipe out the mat. Let it dry and store away.
Deep Cleanse
Now, if your mat is dirty, you may need more than a spray and wipe to get it clean. Here is when a “romantic bath” comes in.
a bath tub (or a washing machine)
two towels
drying rack (or two chairs, though you should really consider having a drying rack at home)
1/2 cup of backing soda
scrubbing brush
To give your yoga mat a bath, you will need about twenty minutes for the bath portion (or the wash cycle, cold temp water) and a space to hang to dry your mat for at least 48 hrs. Set the drying rack onto a towel. Take you mat and roll it out into your bath tub, the fitting may depend on the size of your tub and mat, so do the best you can. Spray the yoga mat cleansing solution as described above, if the mat is really dirty, add baking soda . Fill the tub with about 1 to 2 inches of water and begin to use the good 'ol elbow grease with the scrubbing brush. If you are using a washing machine, spray mat with cleaning solution and then add backing soda instead of detergent.
You can repeat the spray, baking soda, water and scrubbing as many times as your mat needs it. When you are satisfied, rinse the mat.
Here is where your muscles come in place. You must wring out as much water as you can, ask for help if mat is too heavy. When you can’t squeeze more water out of the mat, roll your mat and one of the towels together as shown in the picture. You can step on this roll to get as much water out of the mat as possible. You can hang your mat on the drying rack for 48 hrs or so, make sure the mat is dry before you start using it again. You will feel so good and proud of your mat. Keep cleaning it with the spray/wipe method and you probably won't need to do the bath more than once or twice a year.
Create your bolster substitute
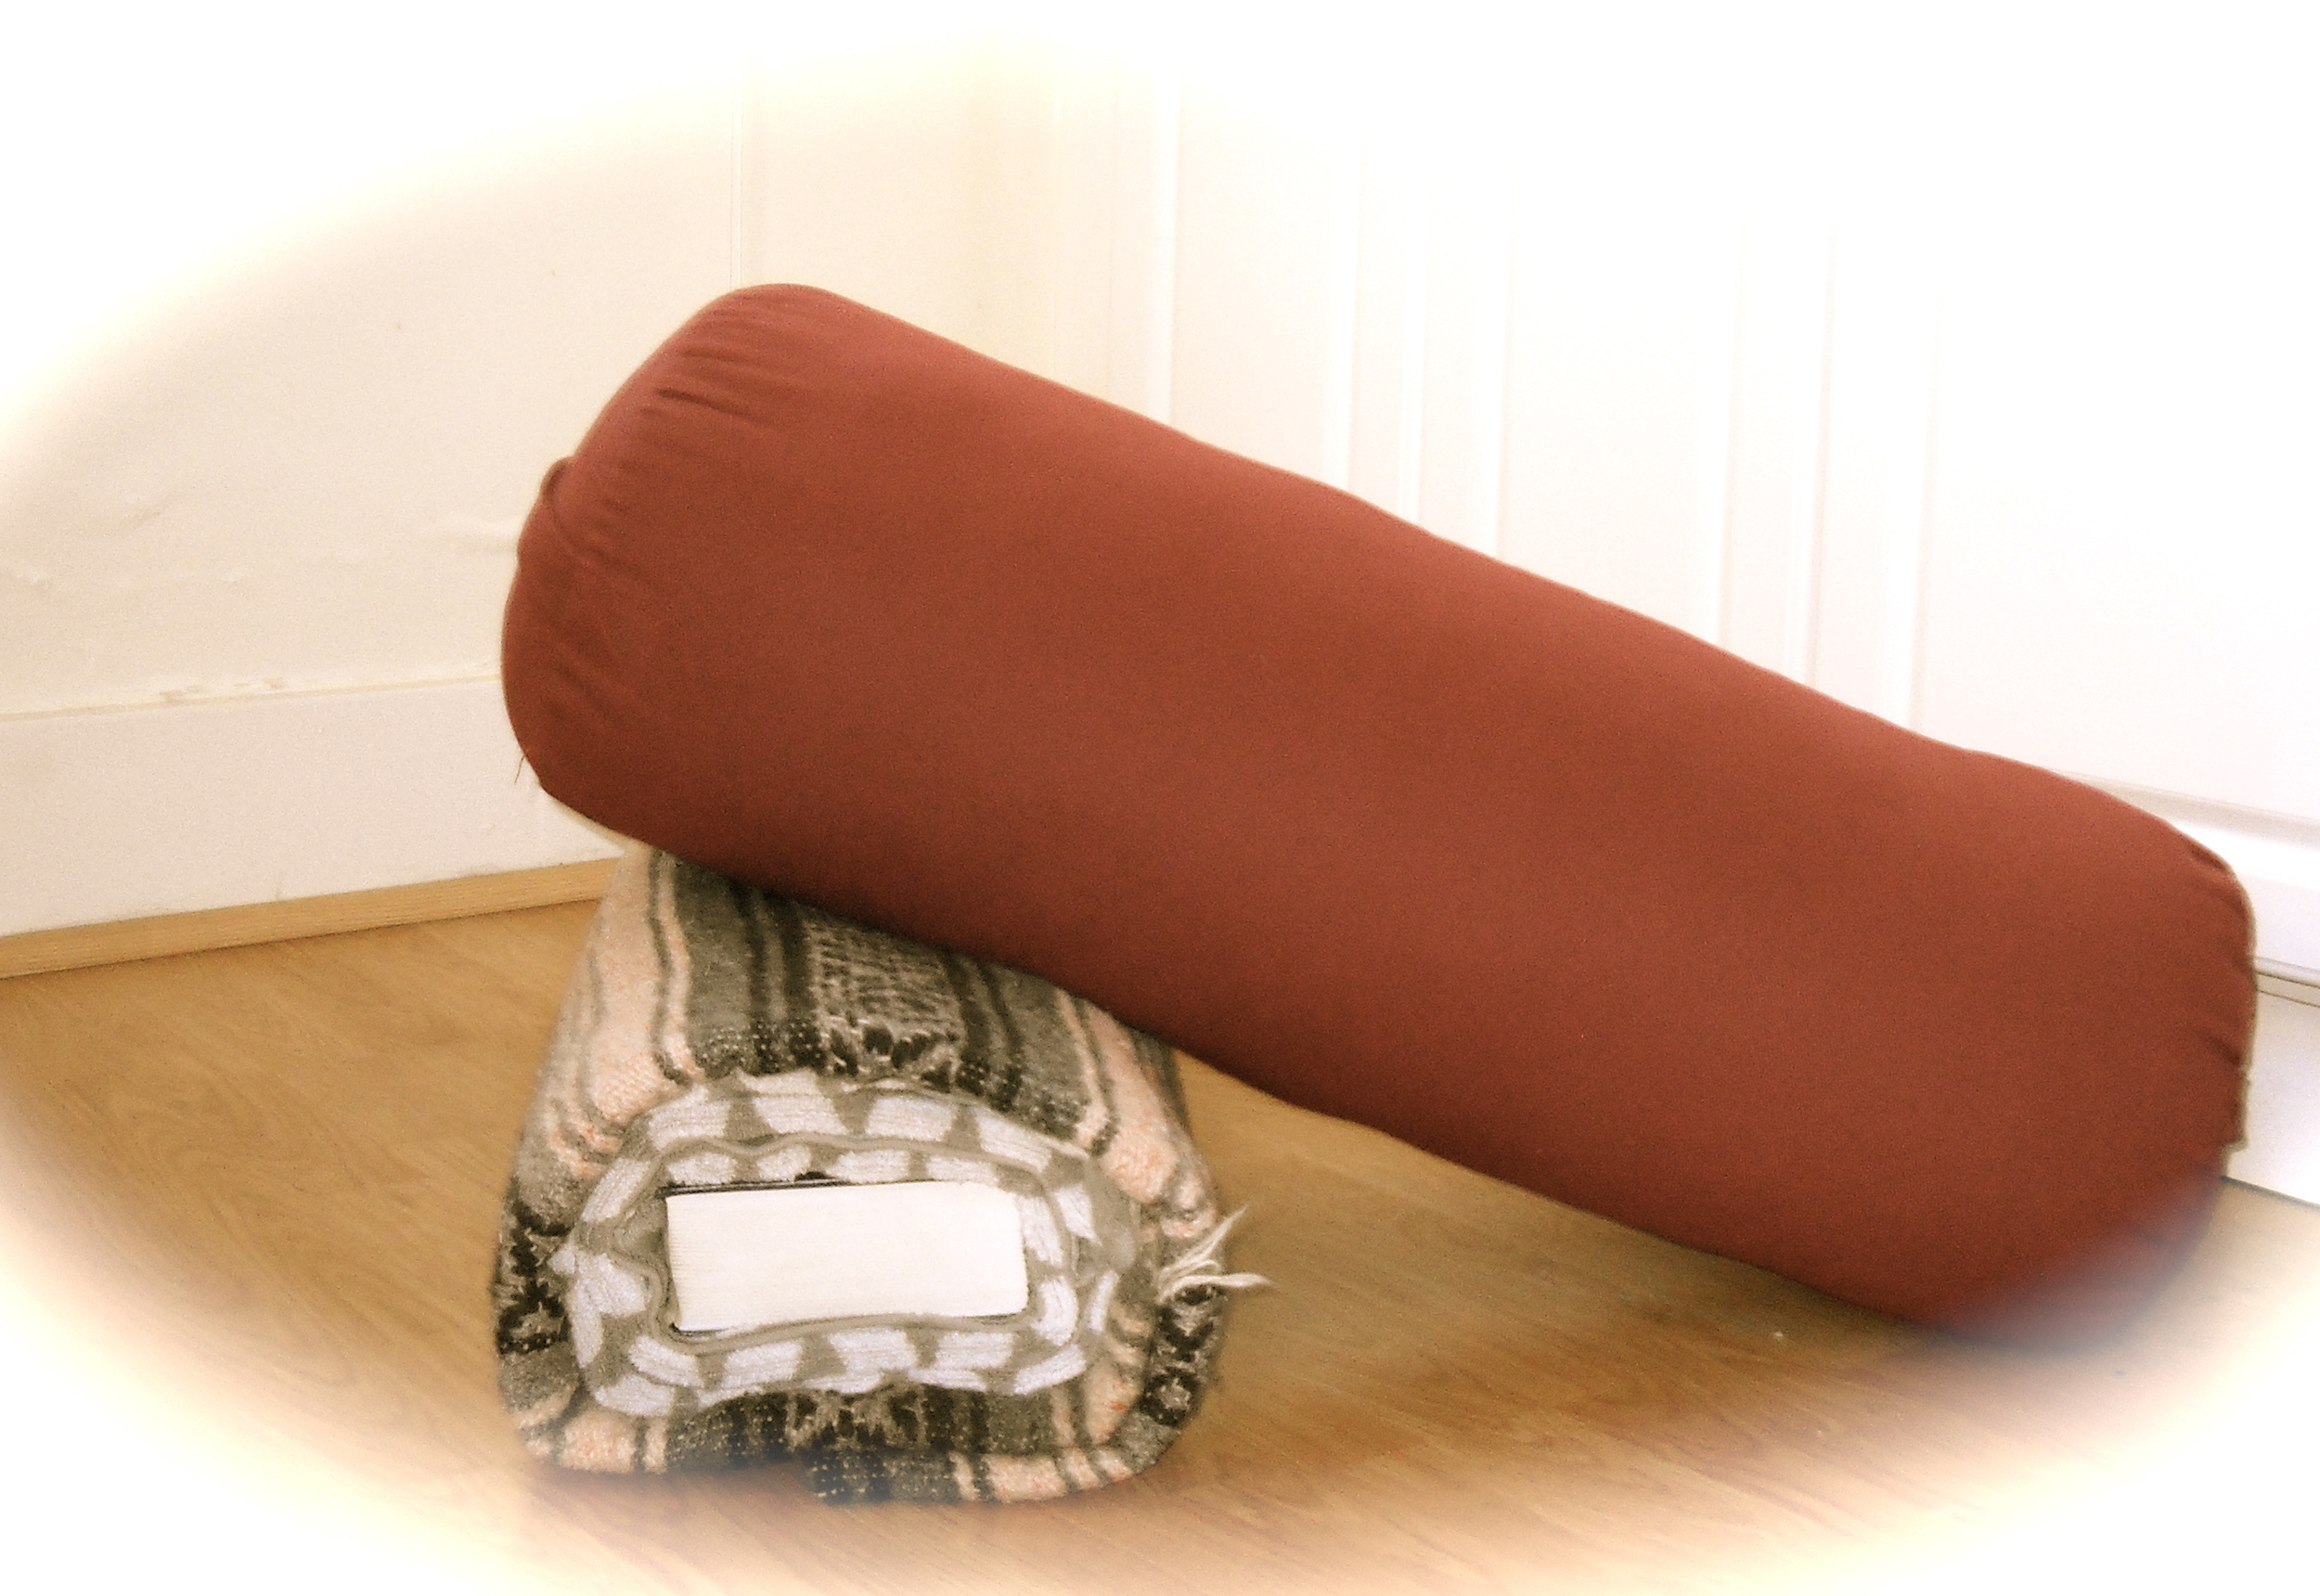 I heard that there used to be a tradition, not sure where, in which a wife would construct a long cushy pillow out of bamboo and offer it to her husband before he'd go on a trip. They idea, was that he wouldn't feel so lonely at night. This, I heard, is the story behind the name "Dutch Pillow," a cousin of the bolster. I don't know if a bolster can truly replace a spouse, but it can sure make you feel supported when it matter the most: while relaxing in a restorative yoga pose.
Chances are that if you practice any type of restorative yoga, your practice will be enhanced with a bolster, which is a great investment. I really recommend having one at home. However, if you don't have the space for one or if you don't have the inclination of adding a bolster to your collection of "let me try this," here is my way of faking one at home - I mean, if a wife can fake a bed companion for her husband, it is only fair...
I tried various versions of this bolsters substitute, this is the version that resembles the supported feeling of the bolsters you may encounter at a yoga studio.
Things you will need
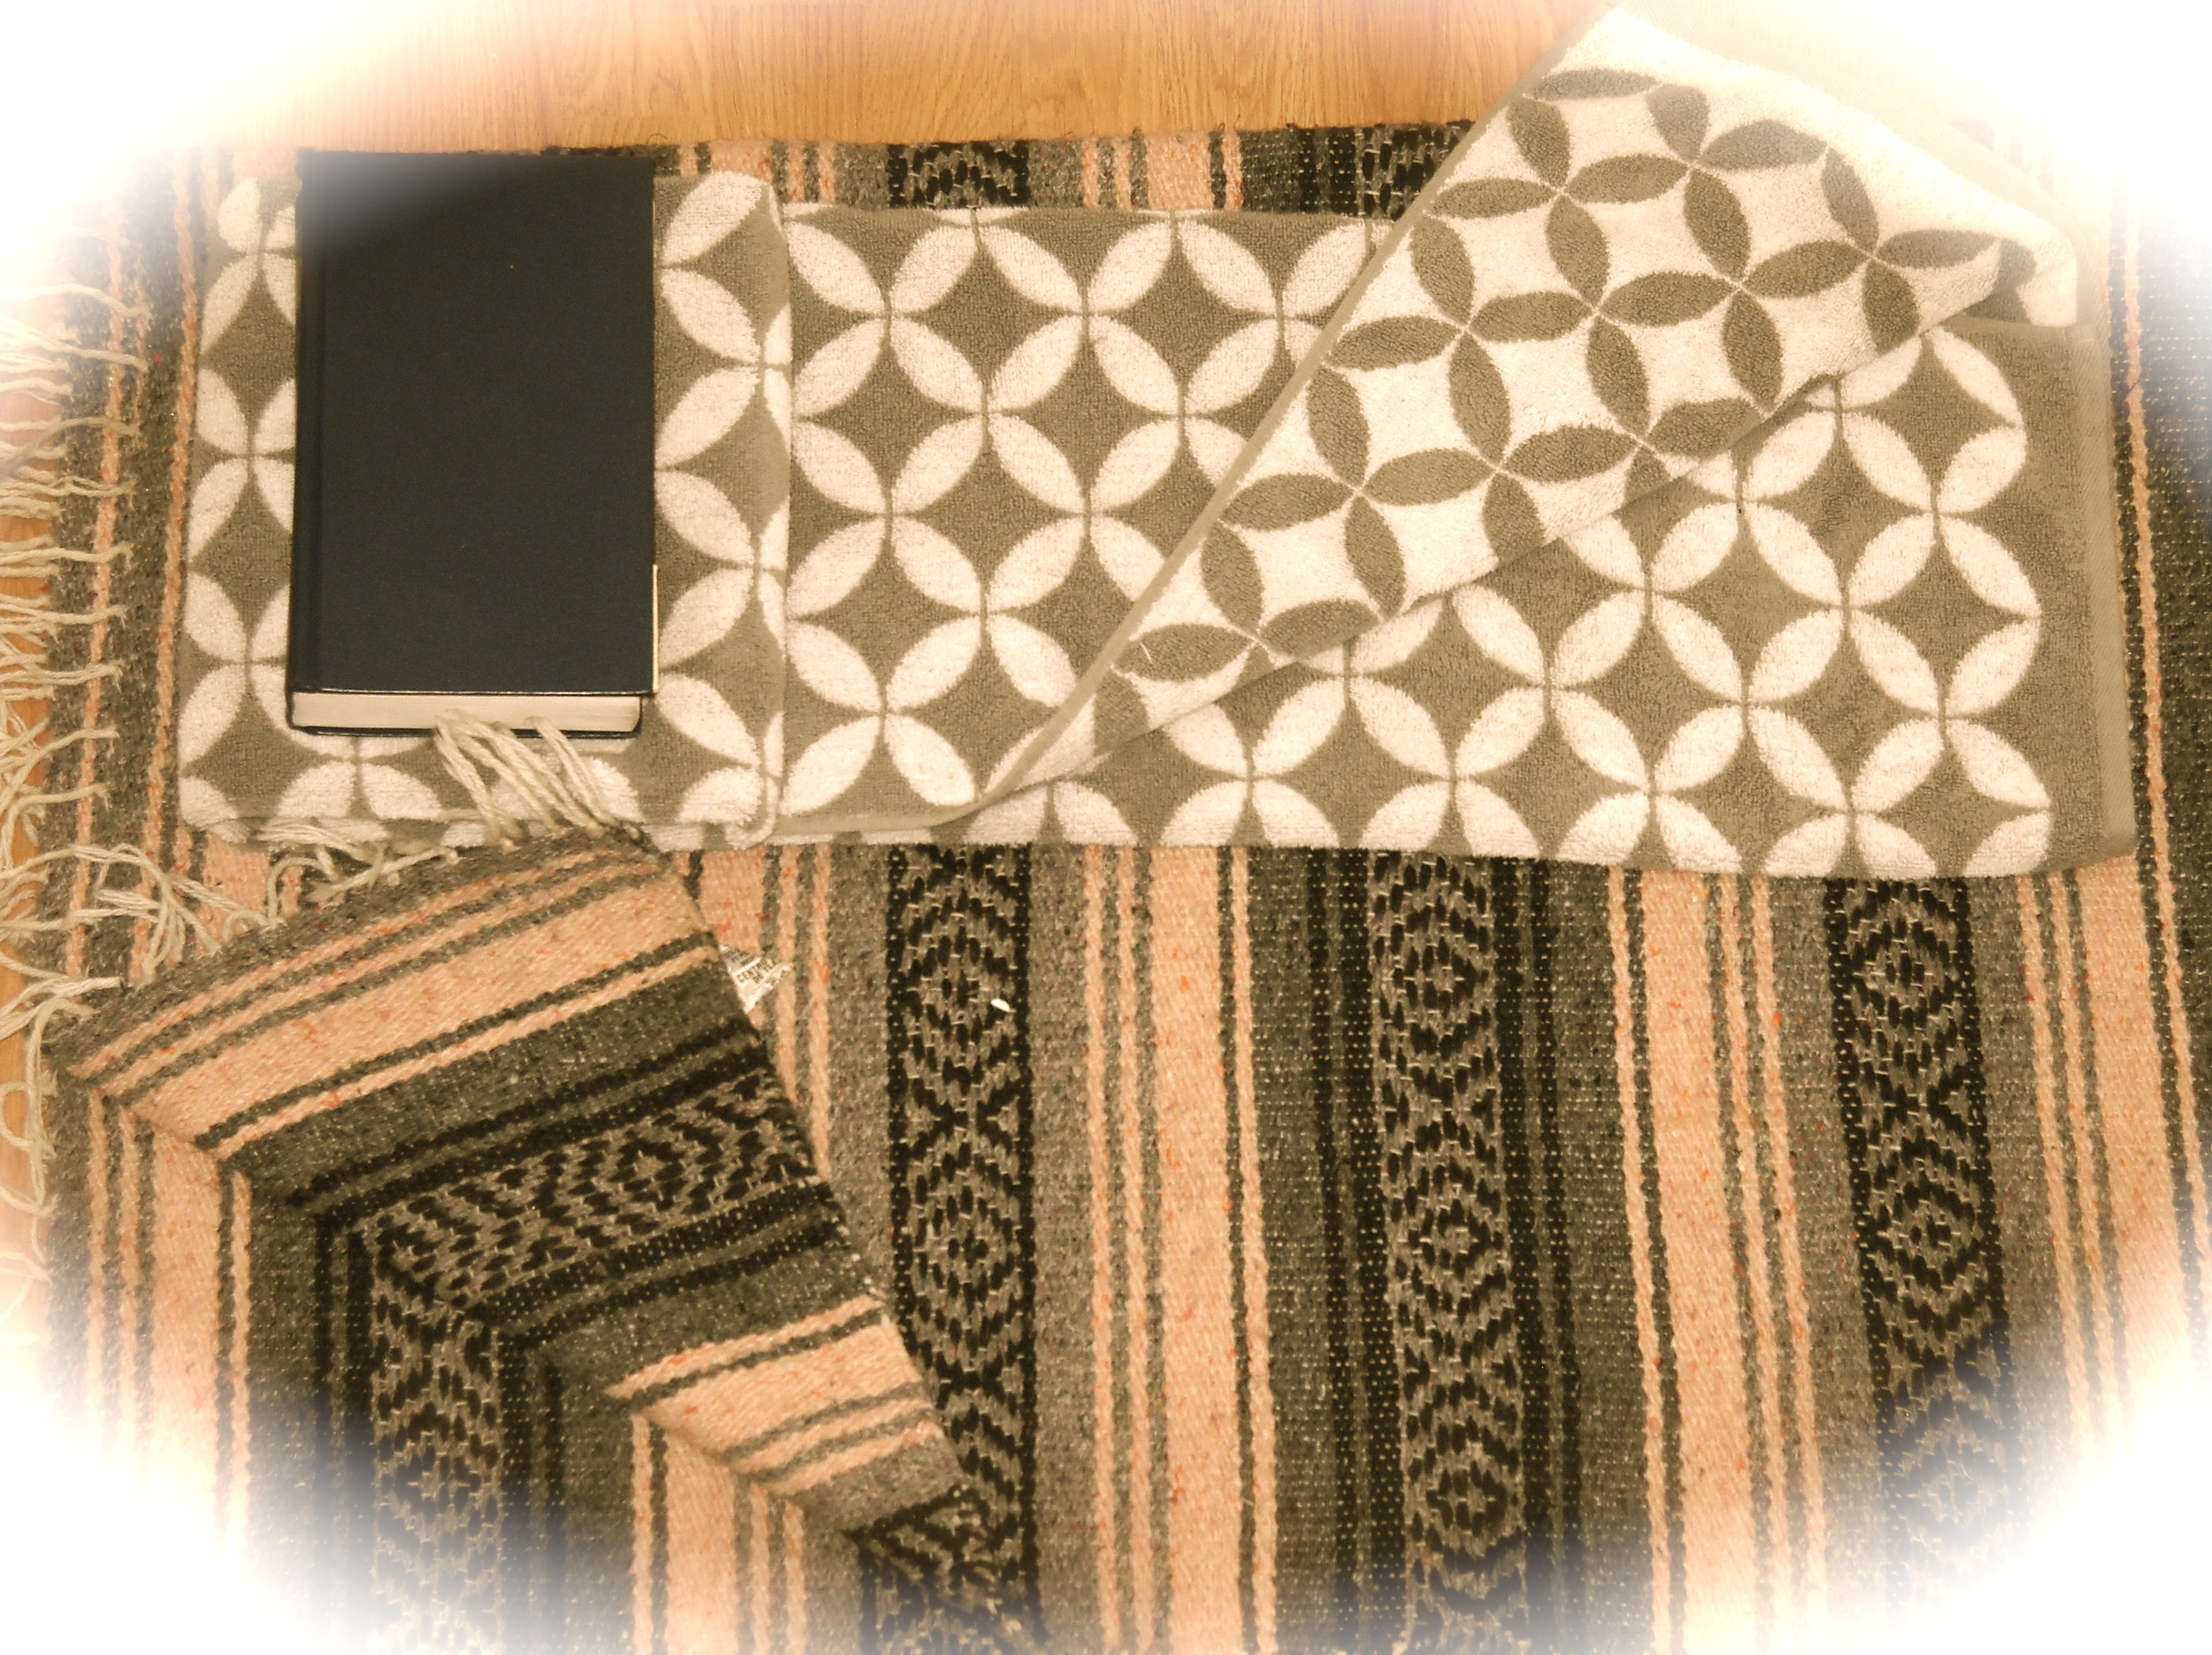
2 blocks or equal size hardcover books, such as Harry Potter (if traveling, hotels usually have handy books available)
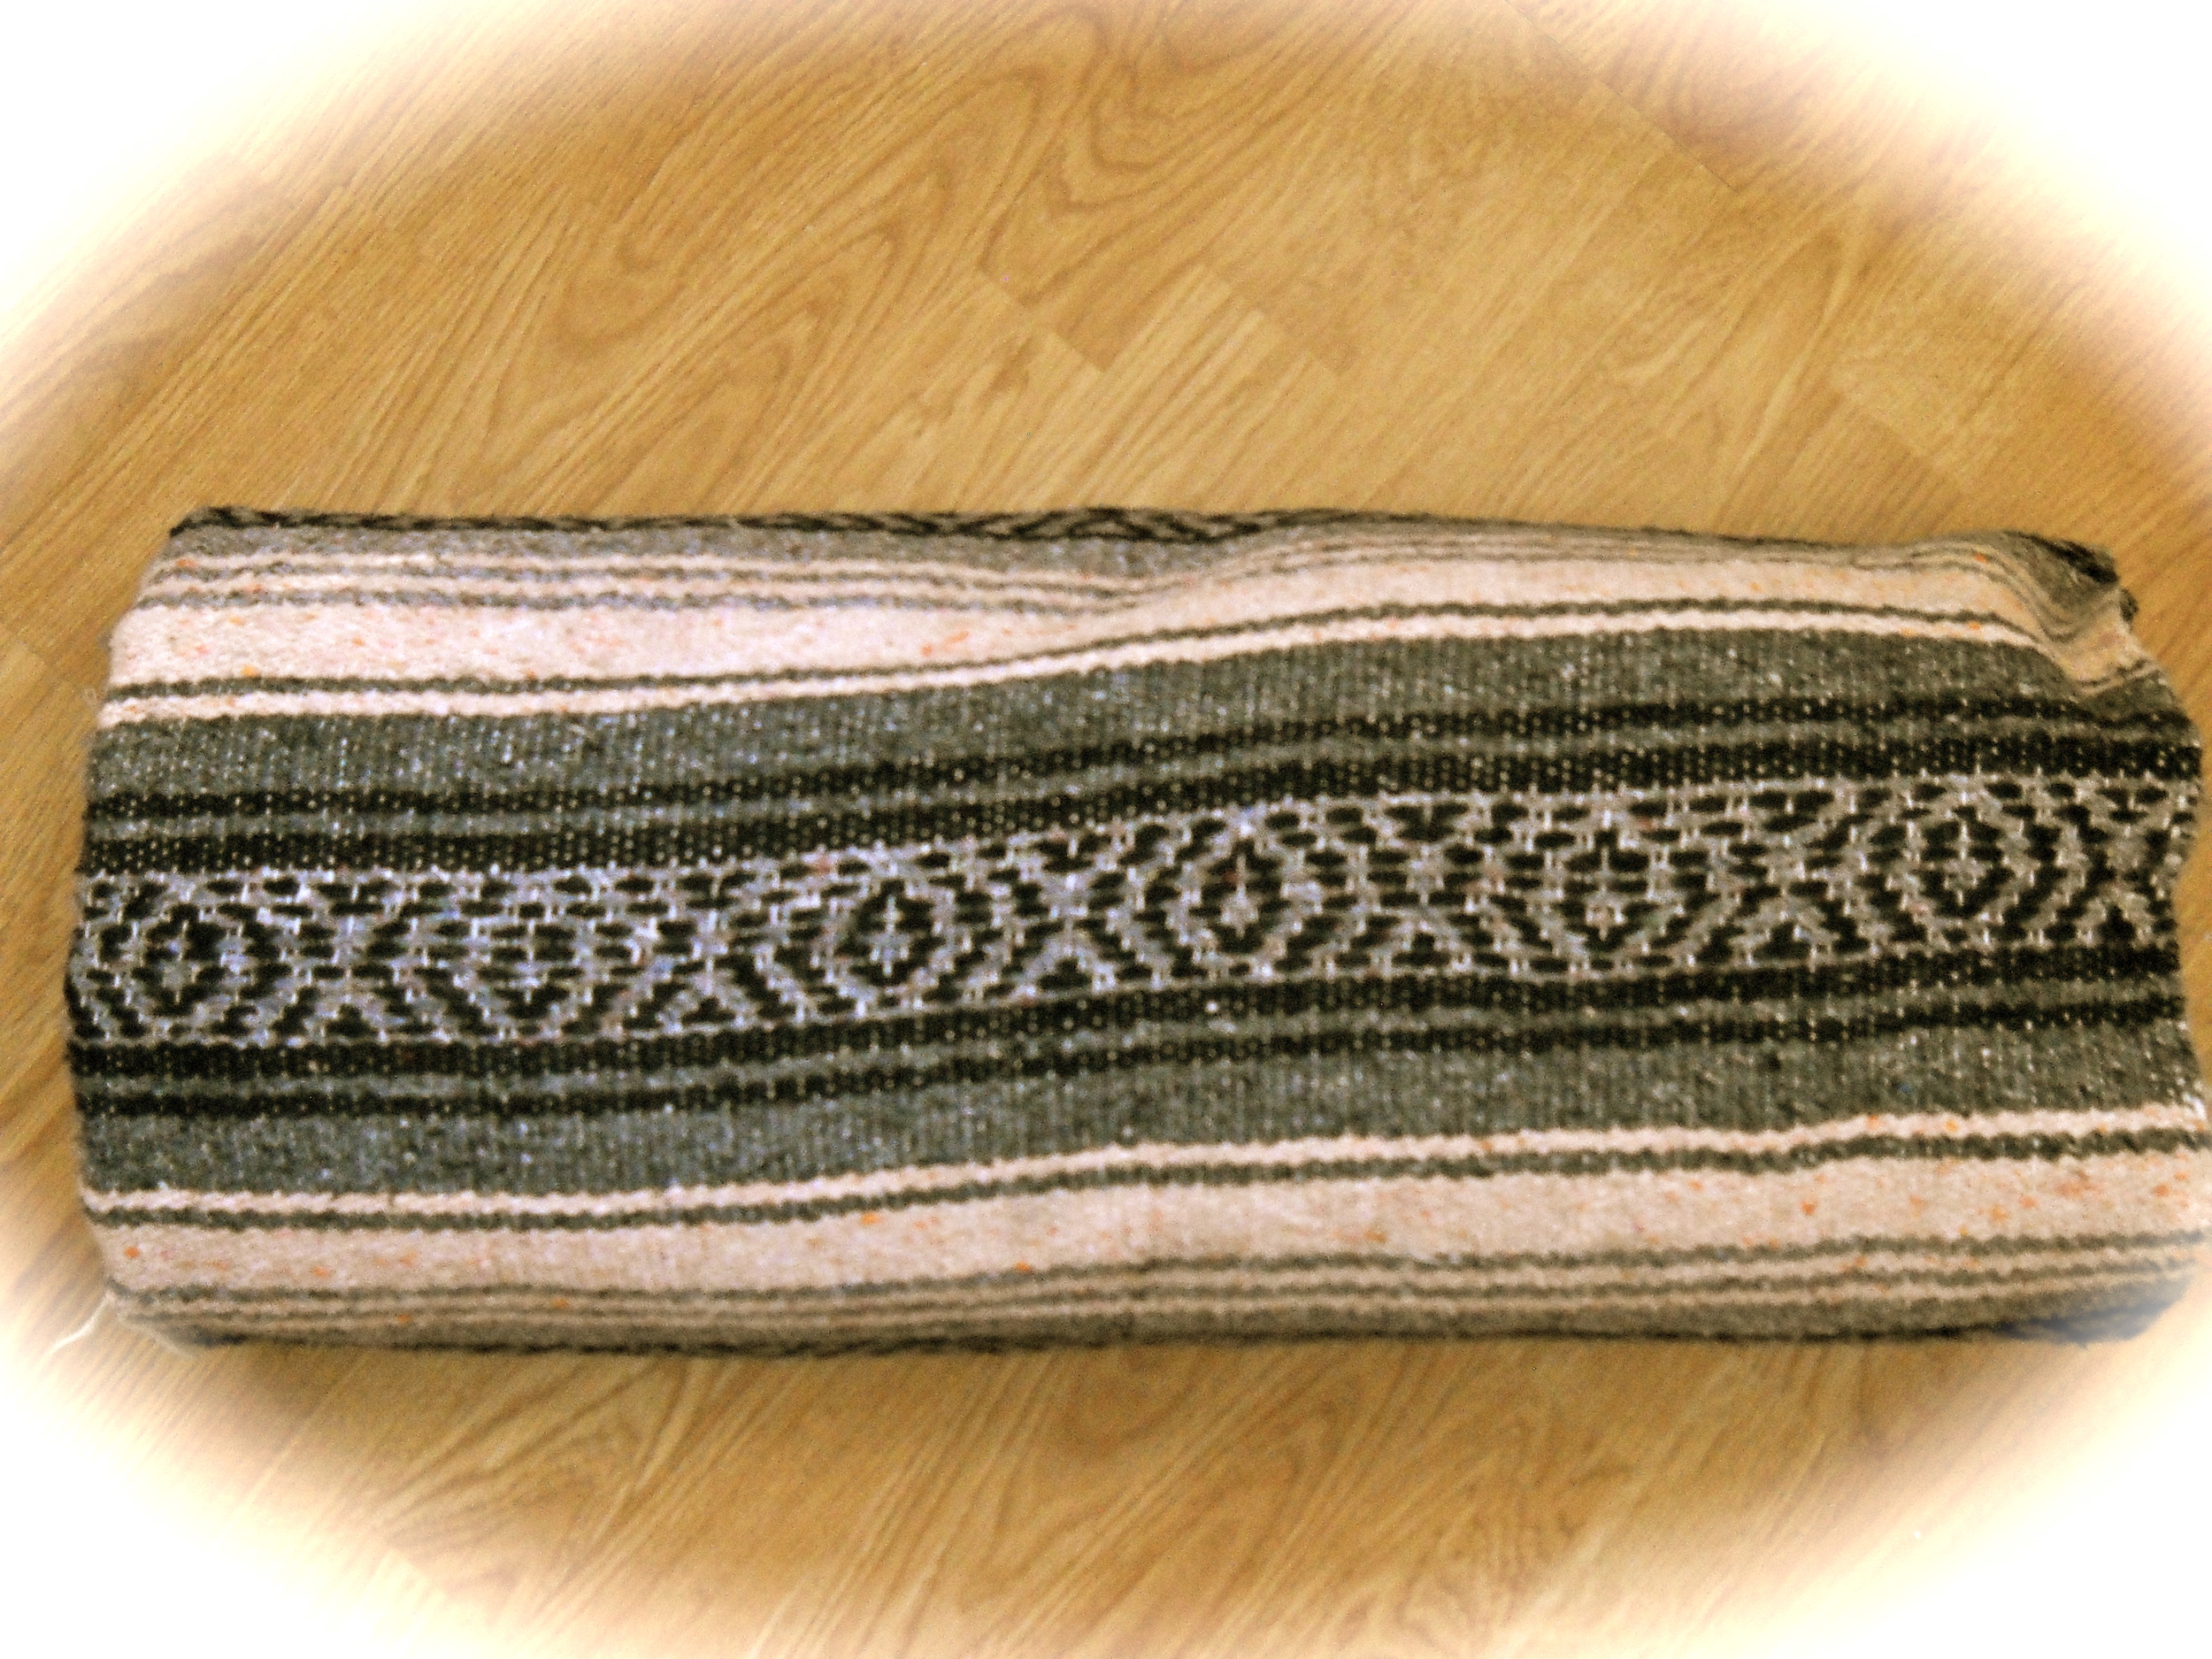
1 heavy blanket - I used a Mexican style blanket
Here is what you do
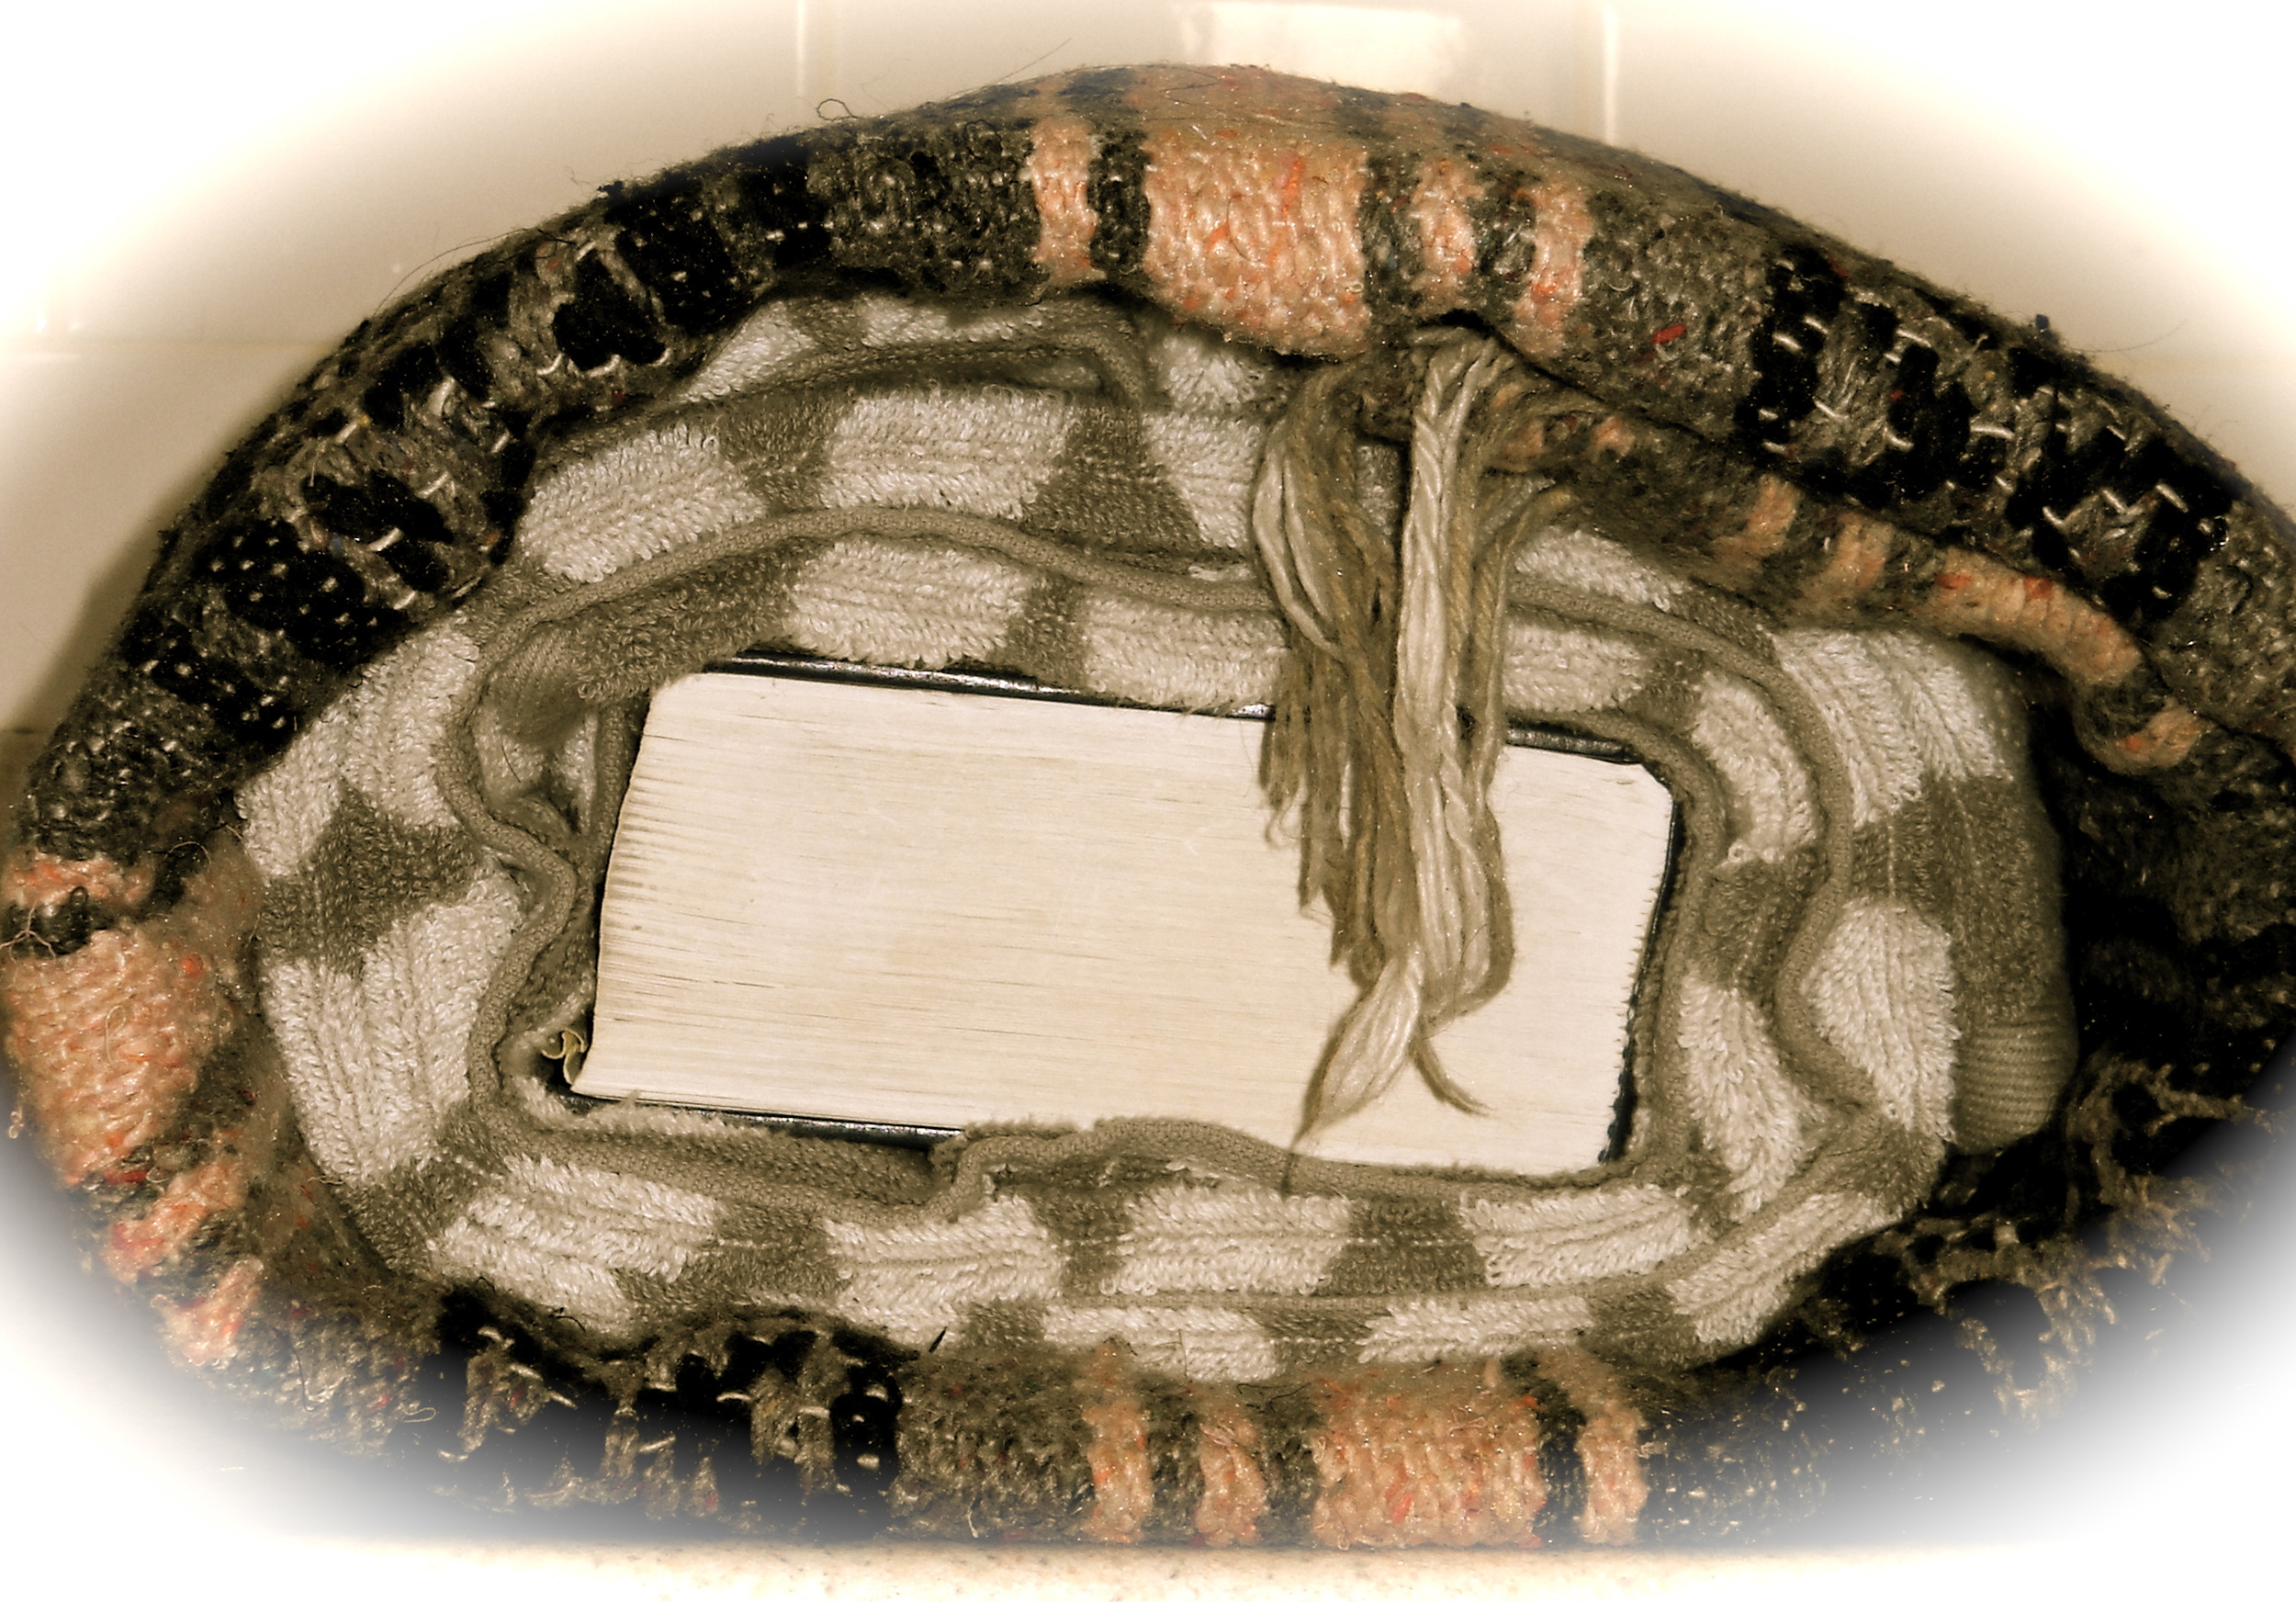 Fold each towel in thirds lengthwise, then fold it into a rectangle over a block/book. Fold the blanket into a quarter of its size, make sure that if the blanket has fringes, they stay to the same side. Place one of the (block/book + towel) rolls lengthwise close to one of the short ends of the blanket, then place the second roll next to it. Fold the blanket over the rolls as many times needed till there is no more blanket left to fold.
Listo, you got yourself a spouse substitute or a pet for your existing bolster! Take it for a spin...there are many restorative yoga poses you can try now.
Boot Tray 2.0
A boot tray in your mudroom or entrance space can be a blessing when you are dragging the not so nice snow in your home. I loved the idea of the boot tra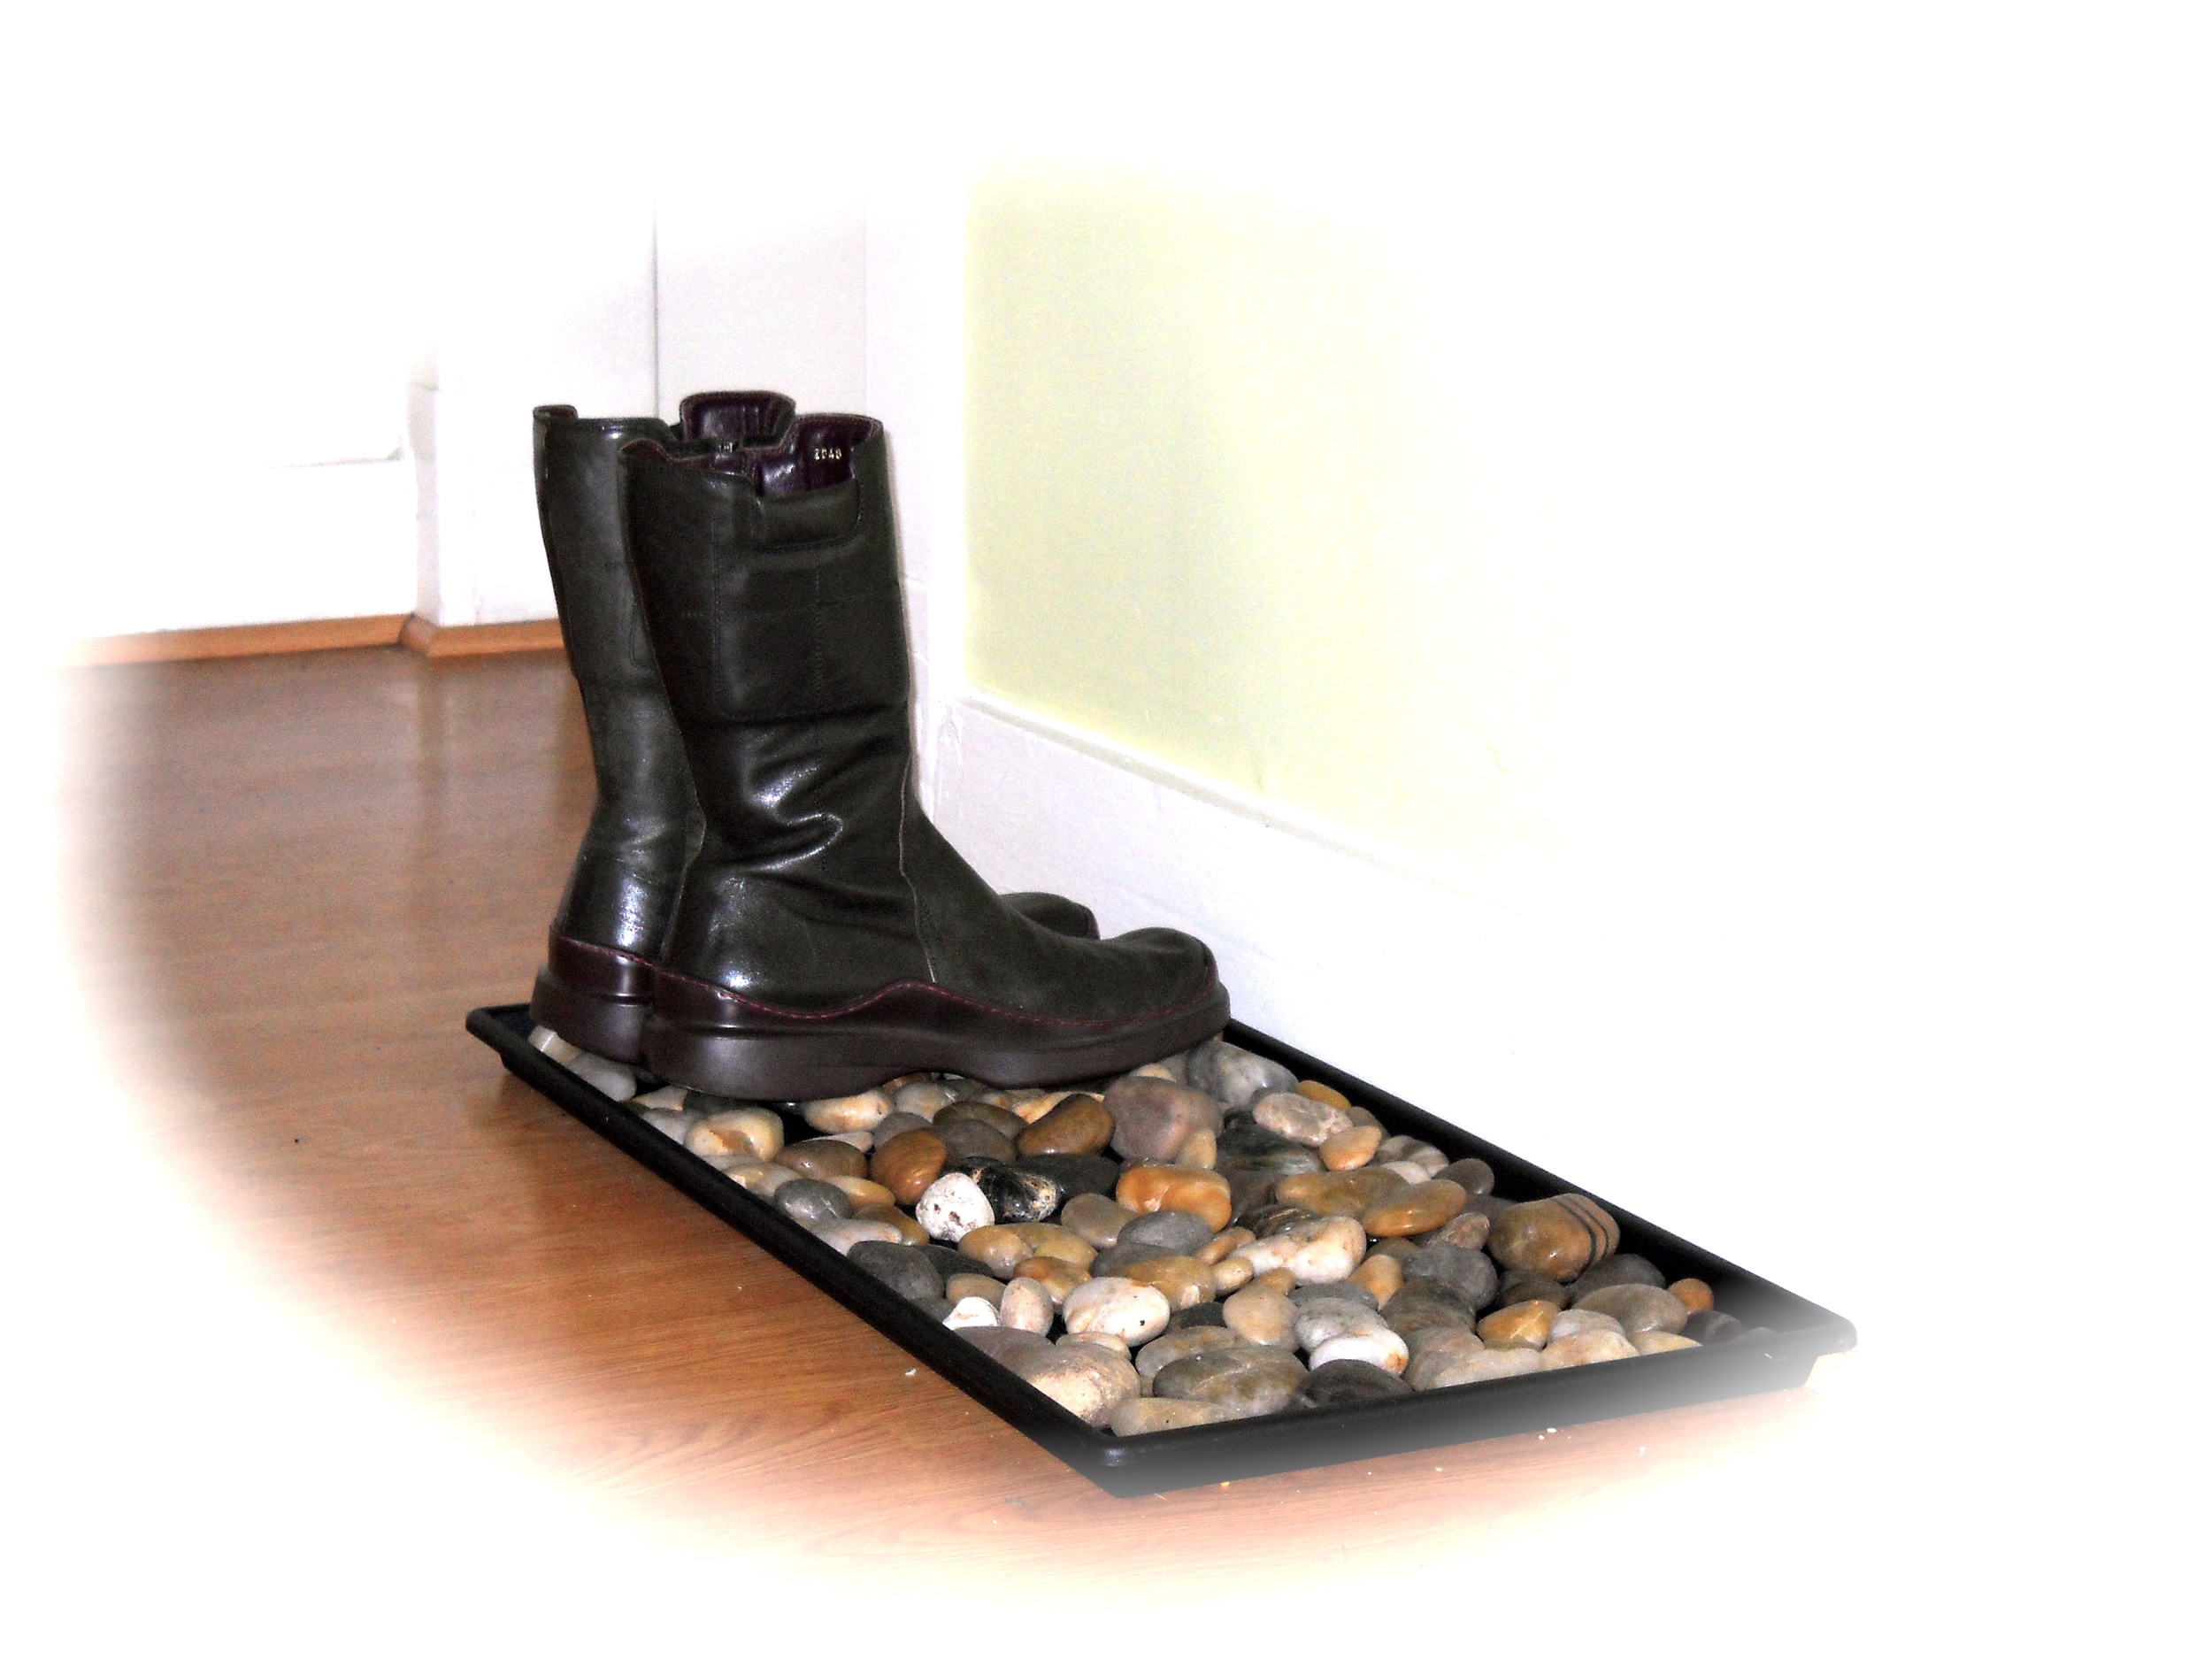 ys, but I was always irritated after a puddle of water was left marinating my snow boots. Martha Stewart to the rescue; she suggests adding river stones to the tray to allow the melting water to move below the stones, allowing the shoes to dry faster and to stay dry. It works so well, I can’t even tell you how exciting I get to see this simple design at work. You can find a rubber tray at The Container Store (TCS) , Bed, Bath and Beyond (BB&B) or simply recycle an old lid from a discarded plastic box. If hunting for river stones is not your thing, Michaels sells the stones.


